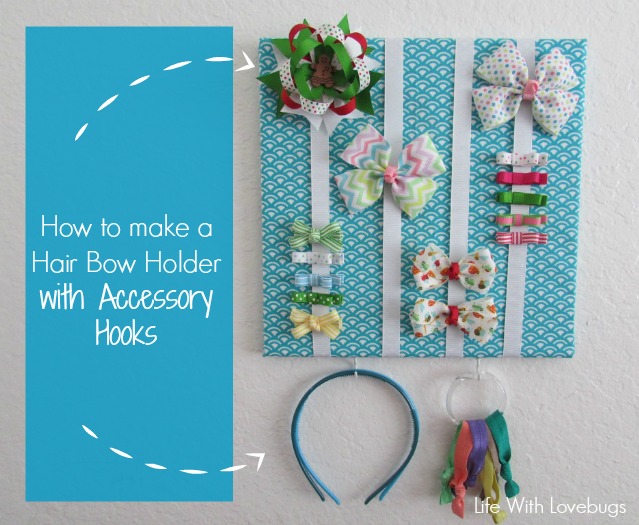
How to Make a Hair Bow Holder with Accessory Hooks
Before my daughter started school she didn’t like hair bows, headbands, or really anything in her hair. We would pull back her hair into a ponytail and call it a day. But now, she wants to accessorize her outfits – hair bows included. I’ve been making hair accessories for over a year now, so I was more than prepared for this. But now that she has so many accessories, for every outfit, of course, we need somewhere to store them. Rather than throw them in a box, I made her a hair accessories holder.
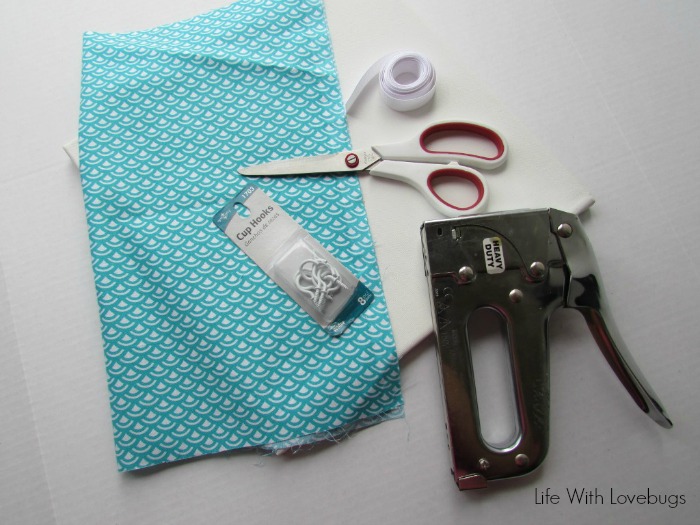
Supplies:
- Art canvas
- fabric that measures 2″ larger on all sides than the canvas
- staple gun
- 5/8″ grosgrain ribbon
- glue, or hot glue gun
- scissors
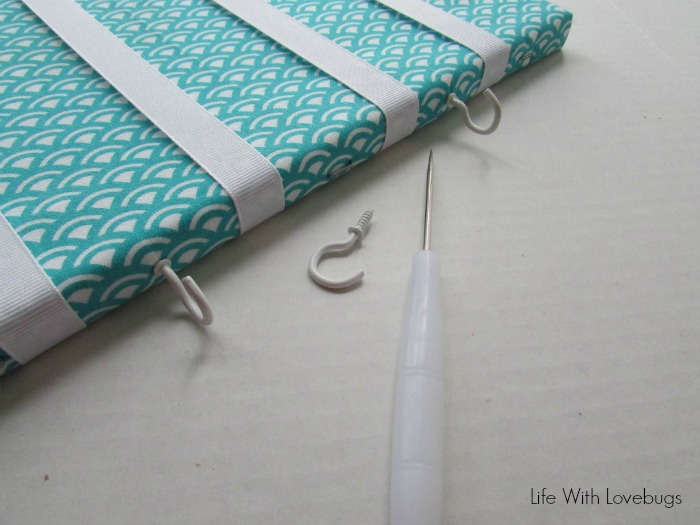
- cup hooks
- awl
Directions:
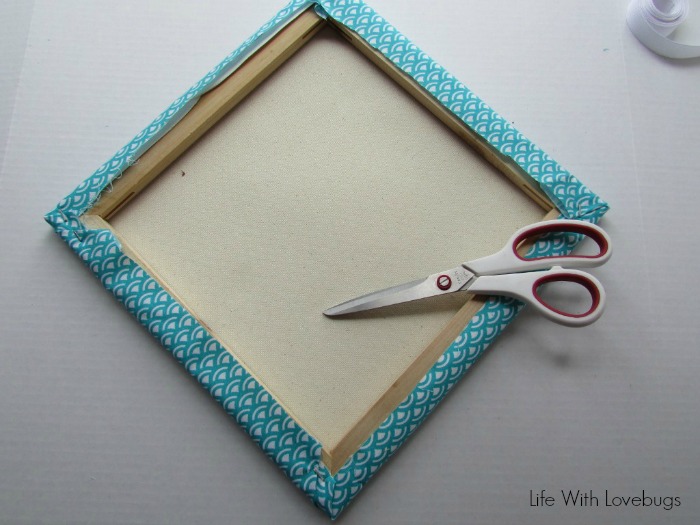
Lay your canvas in the middle of your fabric and fold the fabric over the edges one side at a time, stapling the fabric to the wood frame.
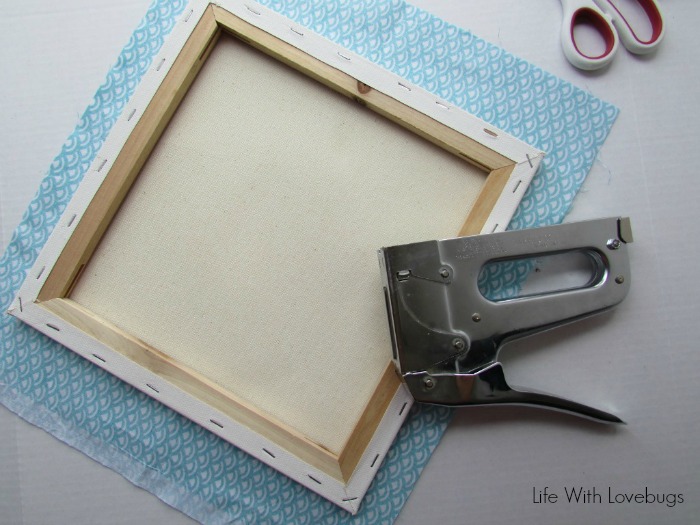
Once all of your sides are done, trim the excess fabric from the edges.
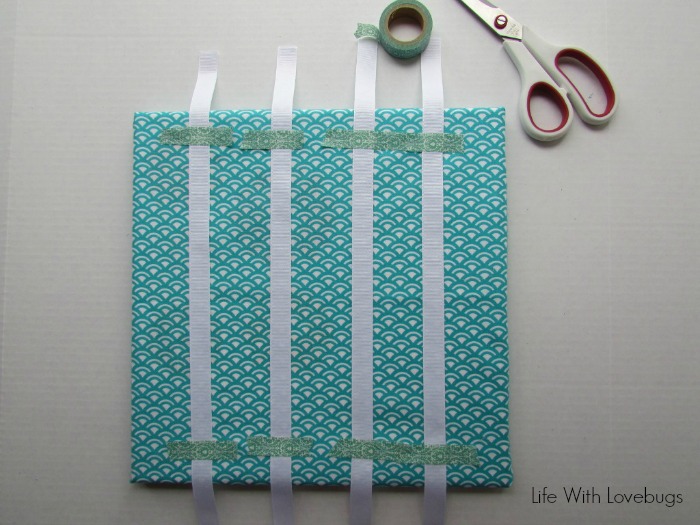
Next, place your ribbon across the front of the canvas and measure out where you want the pieces to lay. I used washi tape to hold the ribbon in place so that they wouldn’t move while I was gluing them to the opposite side. When placing your ribbon, take into consideration how wide your bows are so that there is room for all of them side by side.
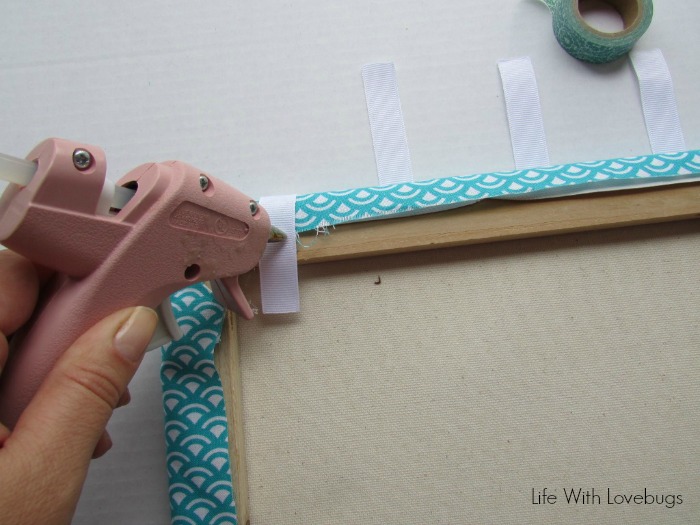
Flip the canvas over and glue each ribbon to the frame, then trim the excess ribbon.
On the bottom of the bow holder, mark where you want your hooks then use your awl to make a hole in the wood frame.
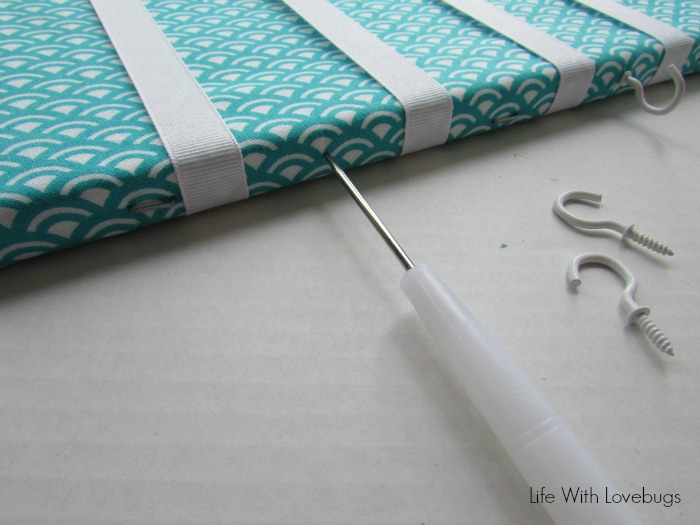
Twist your hooks into place using the holes you just made.
Now you’re done and you can add your bows!
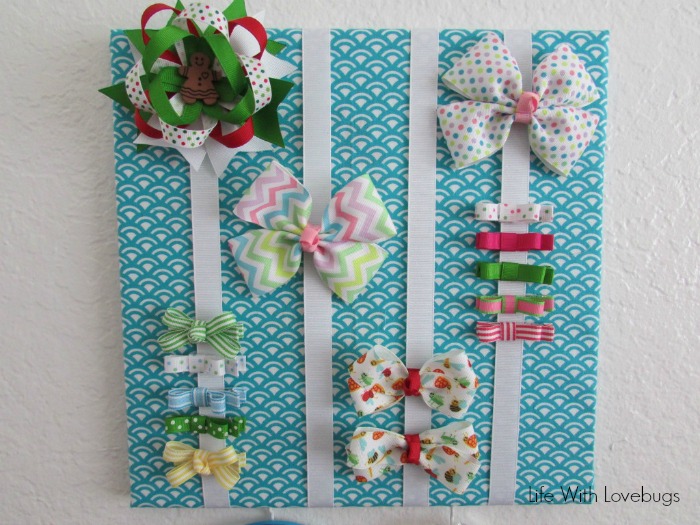
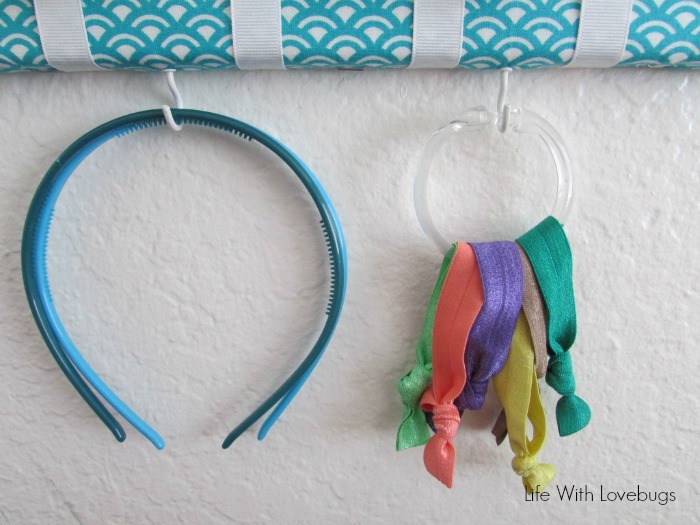
The hooks ended up being smaller than I had anticipated, so for my daughter’s hair ties, I used a shower curtain ring to hang them. I also use these rings in our bathroom on the towel bar to hold fabric headbands and hair ties for myself.
This project took about 15-20 minutes to make. You can make a large bow holder if you have a big collection, I’m sure that I will have to “upgrade” soon at the rate she’s going. I have a little fashionista on my hands here so I better get used to making accessories to match her outfits!
I really need one of these in my Master bathroom for when I get my little girl ready each morning! Good job on your tutorial!
I would love for you to share your creativity on my Show-Licious Craft & Recipe Party! We are live now and you can join us each Saturday morning at 8:00 am EST!
~ Ashley
Stopping by from Making Mon and these is absolutely creative and so useful. Love it! Carrie, A Mother’s Shadow
Monika, this is so cool! Found you on Feeding Big blog hop. Would love it if you’d stop by mine, too. I have a Facebook post hop that goes live tonight at 10:30pm (we’ll boost your post) and my regular is Wonderful Wednesday Blog Hop on Ducks ‘n a Row
I love this! My little girl doesn’t wear hair accessories yet, but I pinned it so I can make it for her when she does. Grow hair, grow!
Thank you so much, Monika. This is really a cute display! I hope you will continue to be inspired and thus inspiring others!