
How to Make Salt Dough Ornaments
I make a lot of Christmas gifts myself and most are not ones that my kids can help with. However my daughter is now 6 years old and wants to do everything that I’m doing so I really wanted to put a project together that she could be involved with for Christmas. We decided on salt dough ornaments, you may have made them yourself as a child. I know that I did! I remember making a small wreath out of salt dough in grade school and gluing a picture of myself to the back…and then my dog ate it off the tree. So if you decide to make these, hang them high on the tree to avoid providing your furry friends with an unintentional snack!
Ingredients:
- 2 c flour
- 1/2 c salt
- 1 c water
- additional flour for dusting
- cookie cutters
- rolling pin
- wax paper (optional)
- Paint, glitter, markers, etc to decorate
Directions:
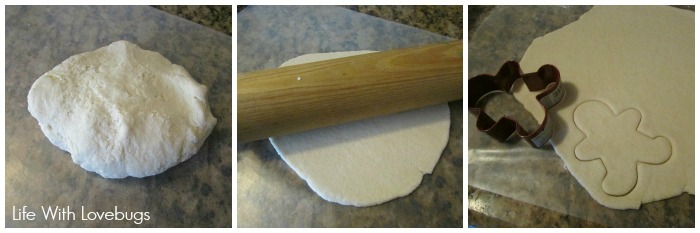
- Mix the flour and salt together, then add the water. Stir until the water is absorbed, then use your hands to mix the remaining dough together. Next, prep your work area. I taped a piece of wax paper to the counter, but you can also dust your counter with flour.
- Take a chunk on the dough and roll it out onto your surface to about 1/8-1/4 inch thick. The dough was very sticky so I ended up using more flour to keep it from sticking to my rolling pin.
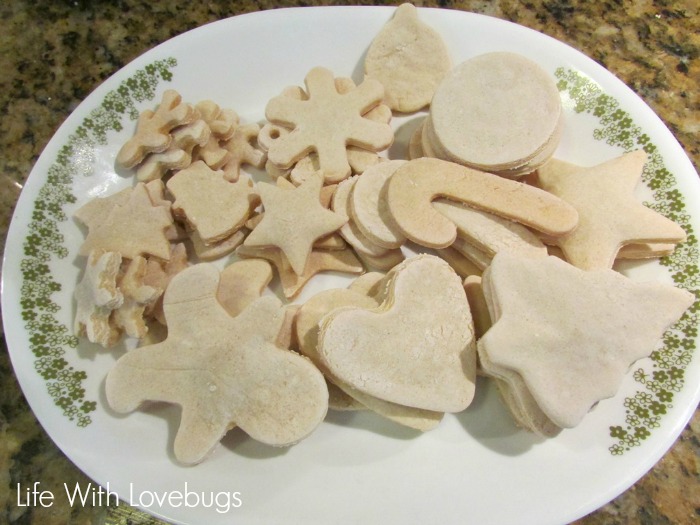
- Use cookie cutters for your ornament shapes and place them on an ungreased cookie sheet. You don’t have to worry about getting them too close to each other, they won’t spread out like cookies. The size you cut them is the size they will end up as.
- If you want your ornament to have a hole to put a ribbon or hook through do this now using a straw (a toothpick makes a hole too small). I left some without a hole and just glued a piece of ribbon to the back, like the gingerbread men. I really wasn’t sure where to stab him!
- Once you have all of your shapes on a cookie sheet, bake them at 300 degrees for 1 hour. Let them cool on the cookie sheet and then you can start decorating!
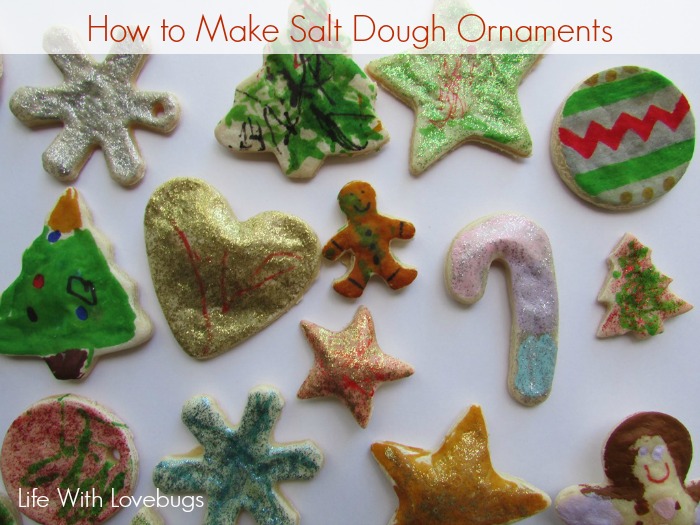
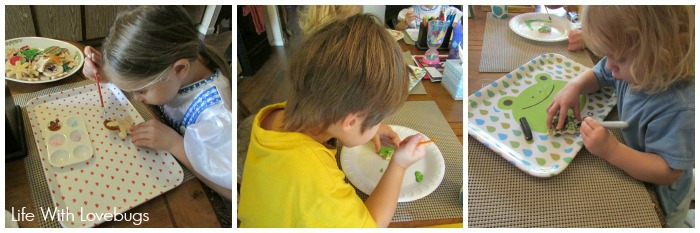
We used basic craft paints, glitter paint and Sharpie pens to decorate our ornaments. Each one of the kids had their own “style” and I made sure to write their names on the back along with the year.
Once they were decorated and completely dry, I added a coat of Mod Podge to seal them so that they would last until next year (fingers crossed!). Now the kids can give these to whomever they like as Christmas gifts!
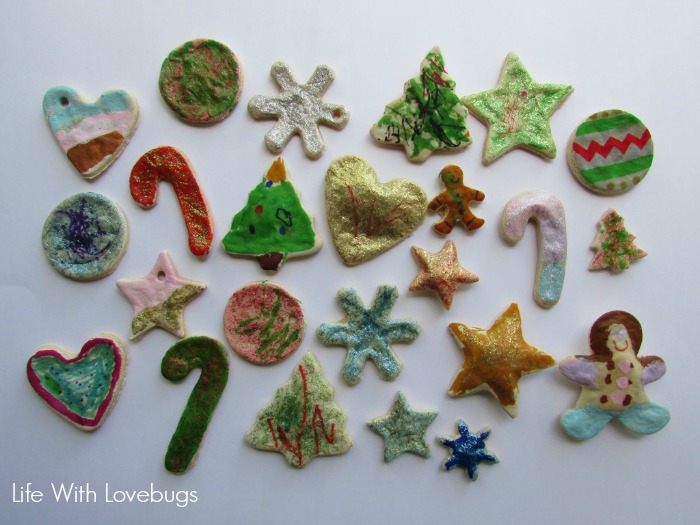
The ornaments pictured above are just a portion of what we decorated. The dough made 24 large (4″) ornaments and 14 (3″) ornaments, which is a lot more than I was expecting. A few of them puffed up (not sure why), but for the most part they all stayed flat.
This was such a fun project to work on with the kids and I was so happy to be able to have all three of them participating!


I love this idea. I am going to make these with my kids using heart shaped cookie cutters and put their classmates names on them for Valentines. There are so many sweets as it is already during their Valentines class parties.
What a great idea! I love that, wish I would have thought of it before I made 30 paper valentines covered in glitter… :) -Monika