
Easy Halloween Treat Bag Tutorial
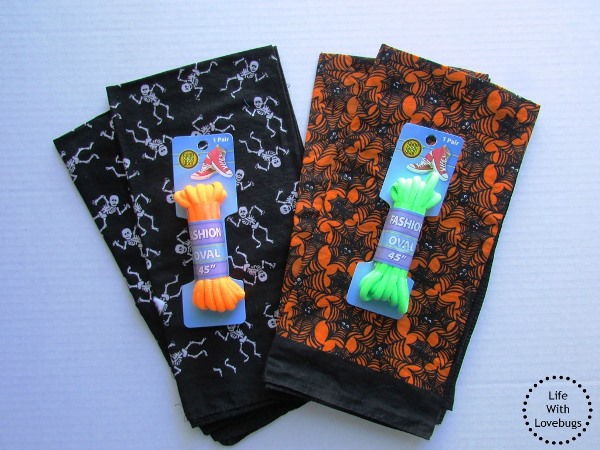
For all of my kids I’ve made them their own Halloween treat bag to take around with us for trick-or-treating. We’ve gone to the fabric store, picked out fabric and make a whole day of it. But holiday fabric can be expensive! At a shopping trip recently to Walmart I notice that they had Halloween bandanas so I picked up a few thinking I could use them in some sort of project. Once I got the idea to make them into treat bags I thought I would pick up a few more, but they were all gone! Phew, thank goodness I picked them up the first time. I tried to think of what to use for the drawstrings and then I saw these bright shoes laces that looked perfect! These bags are super easy to make and since bandanas come is all sorts of colors and prints, you can make them for several occasions.

Supplies:
- 2 bandanas
- 1 pair of 45″ shoe laces
Directions:
Step 1 – Fold over the border toward the wrong side of the fabric on one side of the bandana and pin (if nessesary). Then stitch from the bottom seam of your fold with a 1/4″ seam allowance. Repeat on your second bandana.
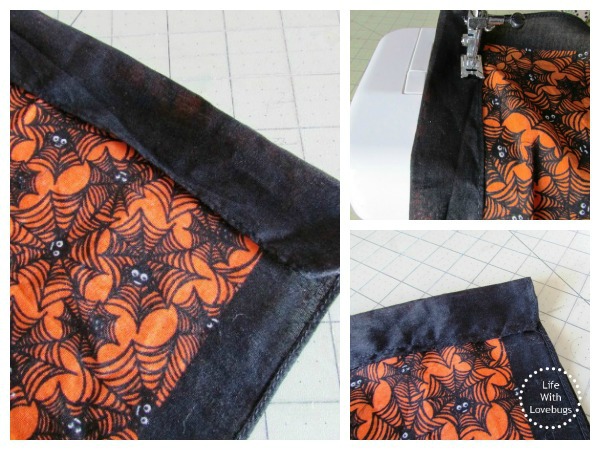
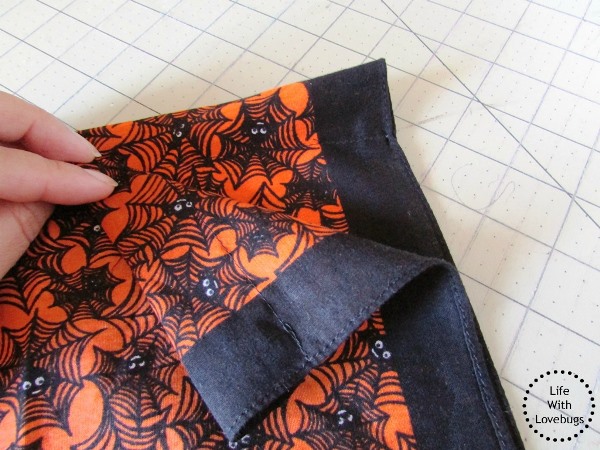
Step 2 – Place your two bandanas right side together with the hems you just sewed at the top. Starting right below your stitch line, sew all three sides along the line where the border meets the print. This way your bag will be all print instead of showing the border. Turn the bag right side out.
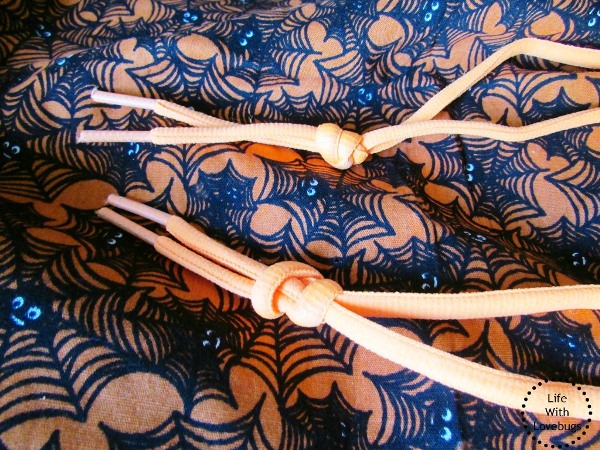
Step 3 – Take one of your shoe laces and thread it through one side of the bag. Once you have reached the end, go through the other side of the bag to the you have both ends of the shoe lace hanging out of one side. The repeat with the other shoe lace, but in the opposite direction. Once you are done, you will have both ends of each shoes lace hanging out of opposite sides of the bag.

Step 4 – Tie the ends of the shoe lace into a knot and then pull both lace to cloth the bag. And you’re done!
This took about 15 minutes to make, most of which was threading the shoes laces through the hems. Not to bad, right? Each bandana cost $1.00 and the laces were $1.37 each, so each bag was $3.37. I couldn’t purchase Halloween fabric alone for that cost! I hope you enjoyed this project and if you decide to try it, I’d love to see pictures!


Wonderful tutorial Monika and I will have to try it. :)
These are so adorable! Pinned and tweeted!
Love this, Monika! Never would have thought to do that and they came out great!